 powered by apitogo
Set up Stripe for paid plans
A plan with a price is paid through your own Stripe account. apitogo deploy needs two things
from Stripe:
| What | Starts with | What it does |
|---|---|---|
| Secret key | sk_test_ or sk_live_ | Lets your plans backend create checkout pages |
| Webhook signing secret | whsec_ | Lets your plans backend trust Stripe's payment news |
Deploy asks for both, hidden, and stores them as project secrets. They never go into
apitogo.config.json.
Start in a sandbox (Stripe's test mode). The pictures below come from one: nothing you do there charges real cards. Switch to your live account when you are ready to sell.
1. Copy the secret key
In the Stripe dashboard, open Developers › API keys. Under Standard keys, reveal the Secret key and copy it.
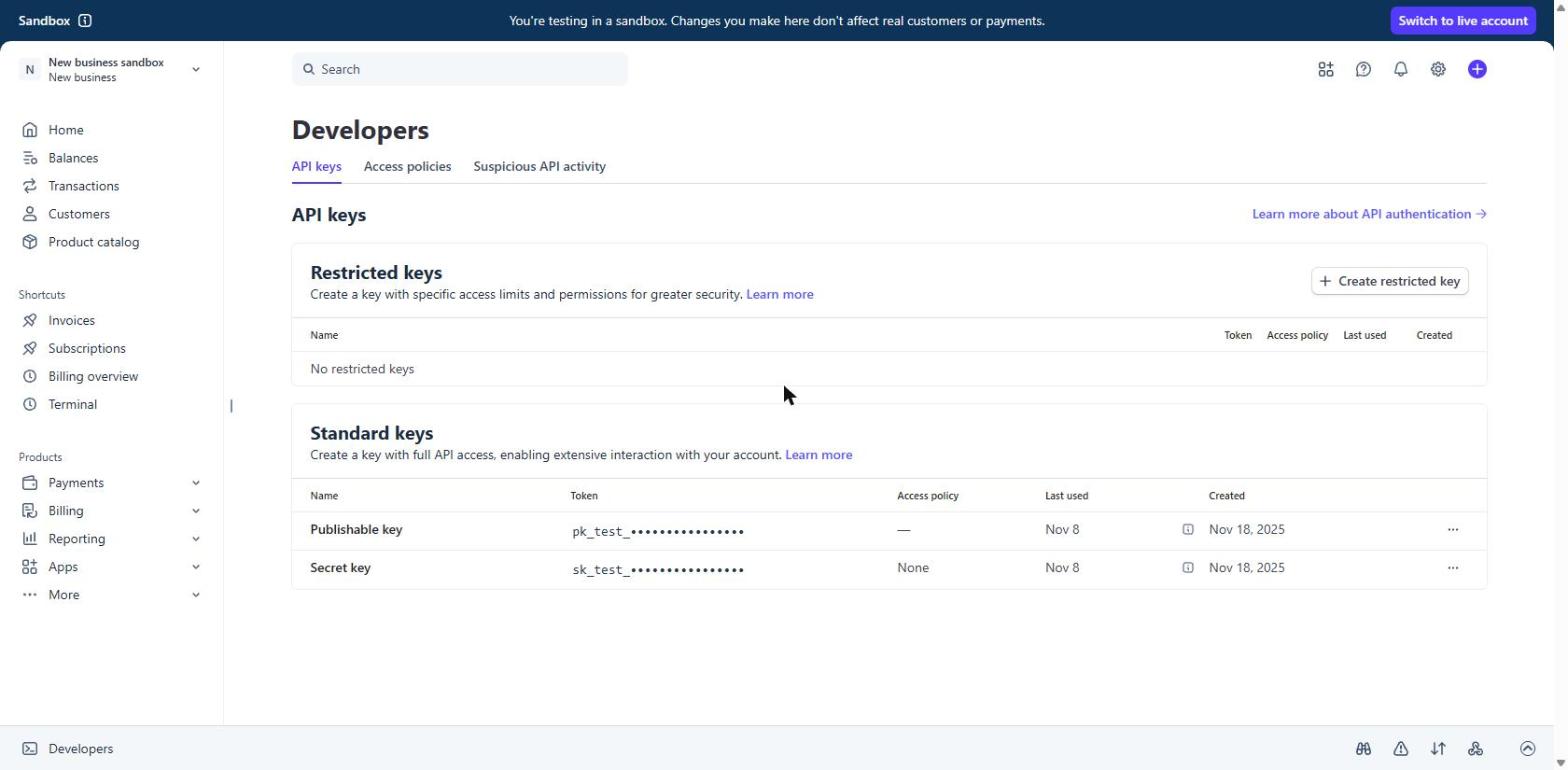
Use the secret key. The publishable key (pk_) cannot take payments, and deploy refuses it. A
restricted key (rk_) works too, if it may write Checkout Sessions, Customers and Subscriptions.
Run deploy and paste the key when it asks:
Code
2. Add the webhook
After a payment, Stripe sends an event to your portal's plans backend. That event is what turns a paid checkout into an active plan.
Deploy prints the address to use, for example:
Code
In Stripe, open Workbench › Webhooks and choose Add destination.
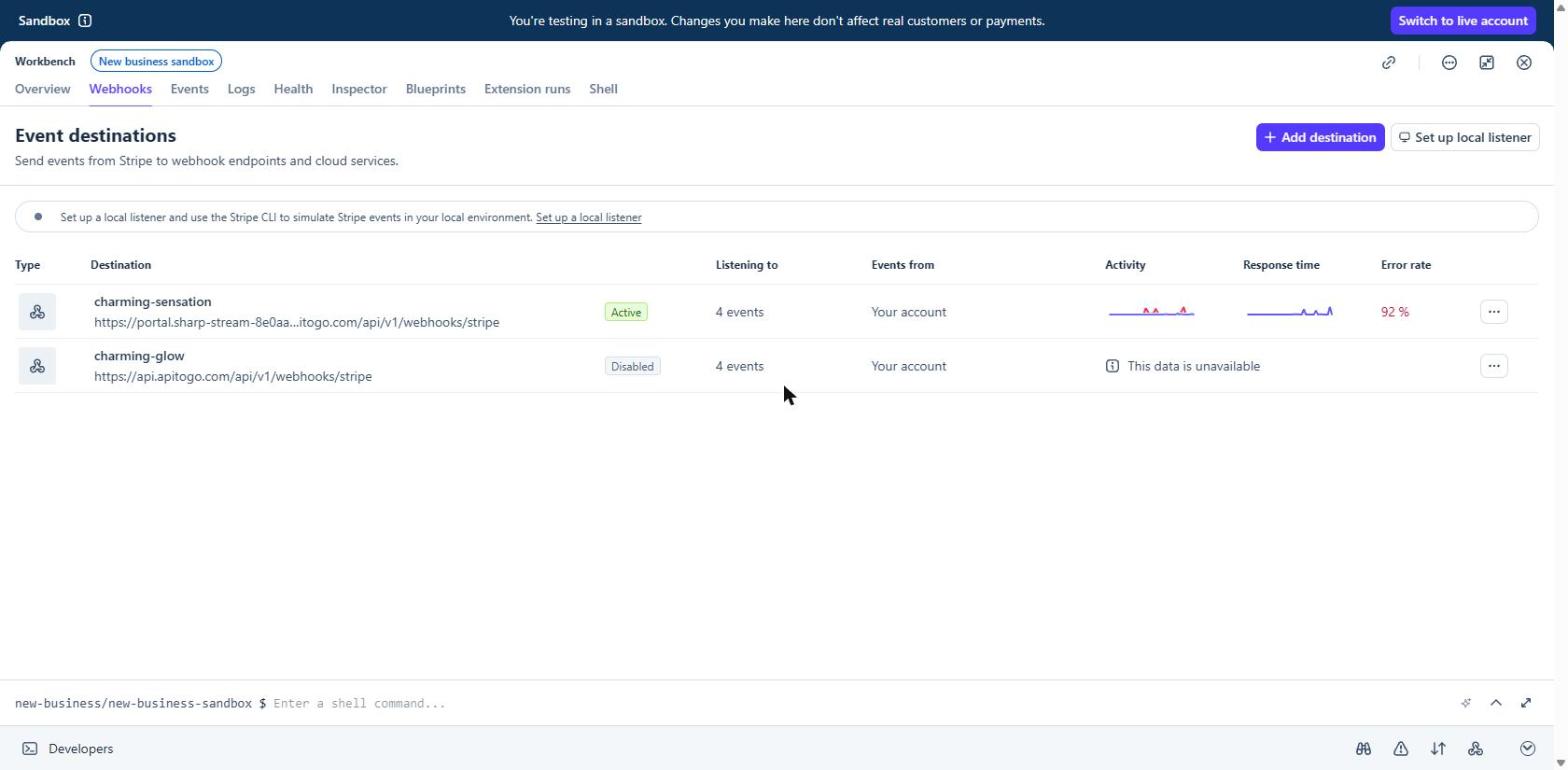
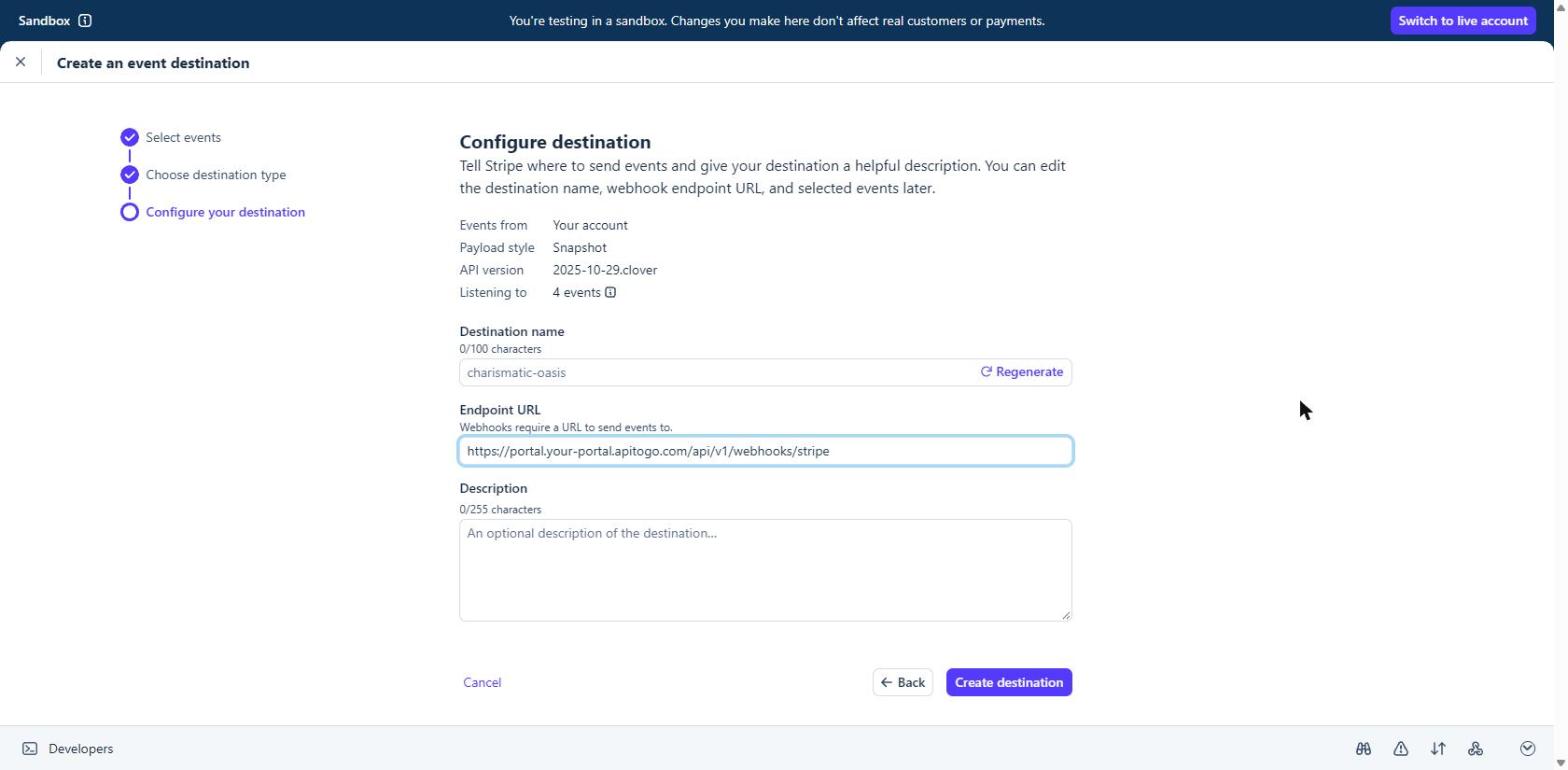
Keep Your account and the Snapshot payload style.
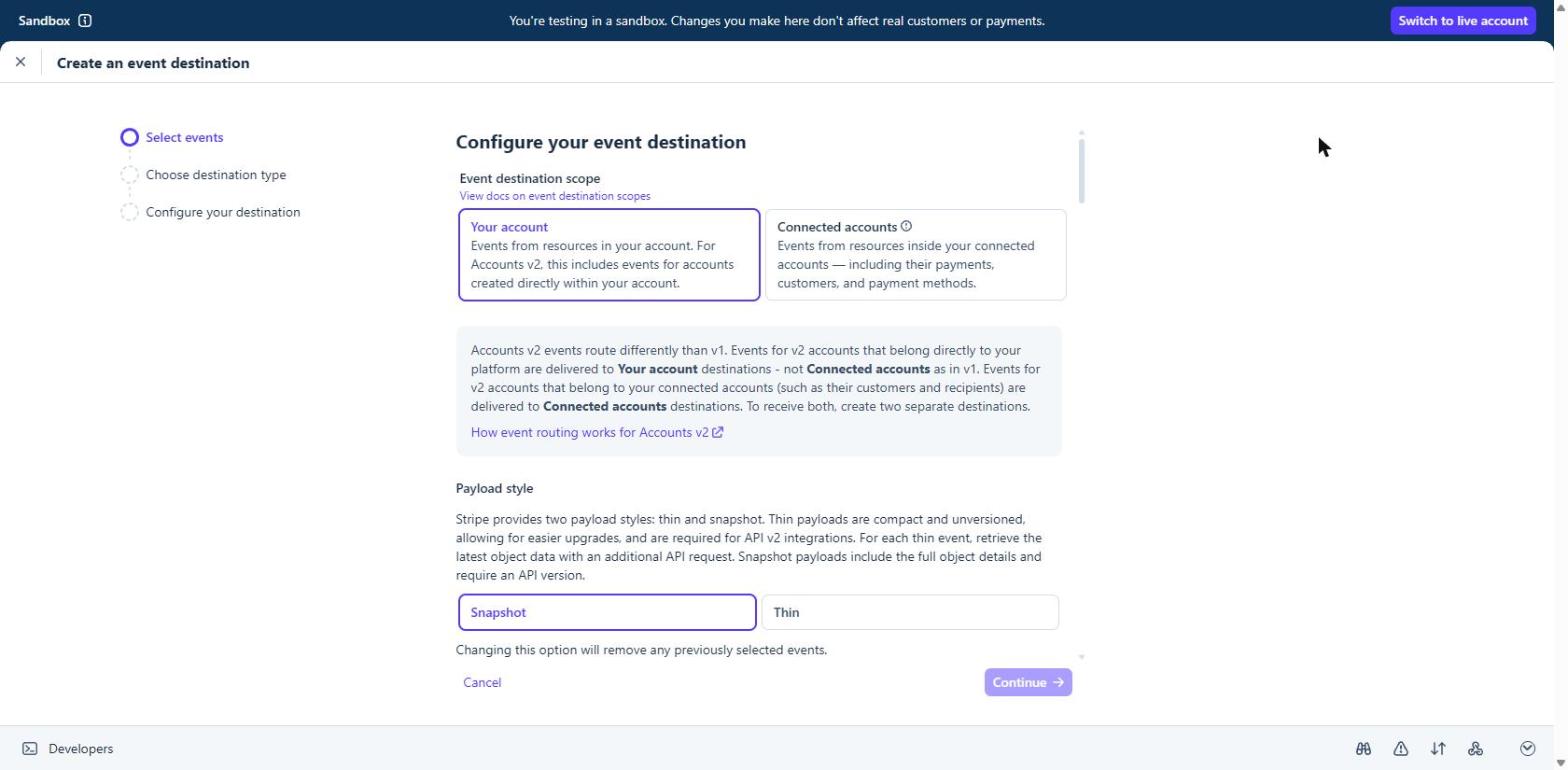
Search for and select these four events:
checkout.session.completedcustomer.subscription.updatedcustomer.subscription.deletedinvoice.payment_failed
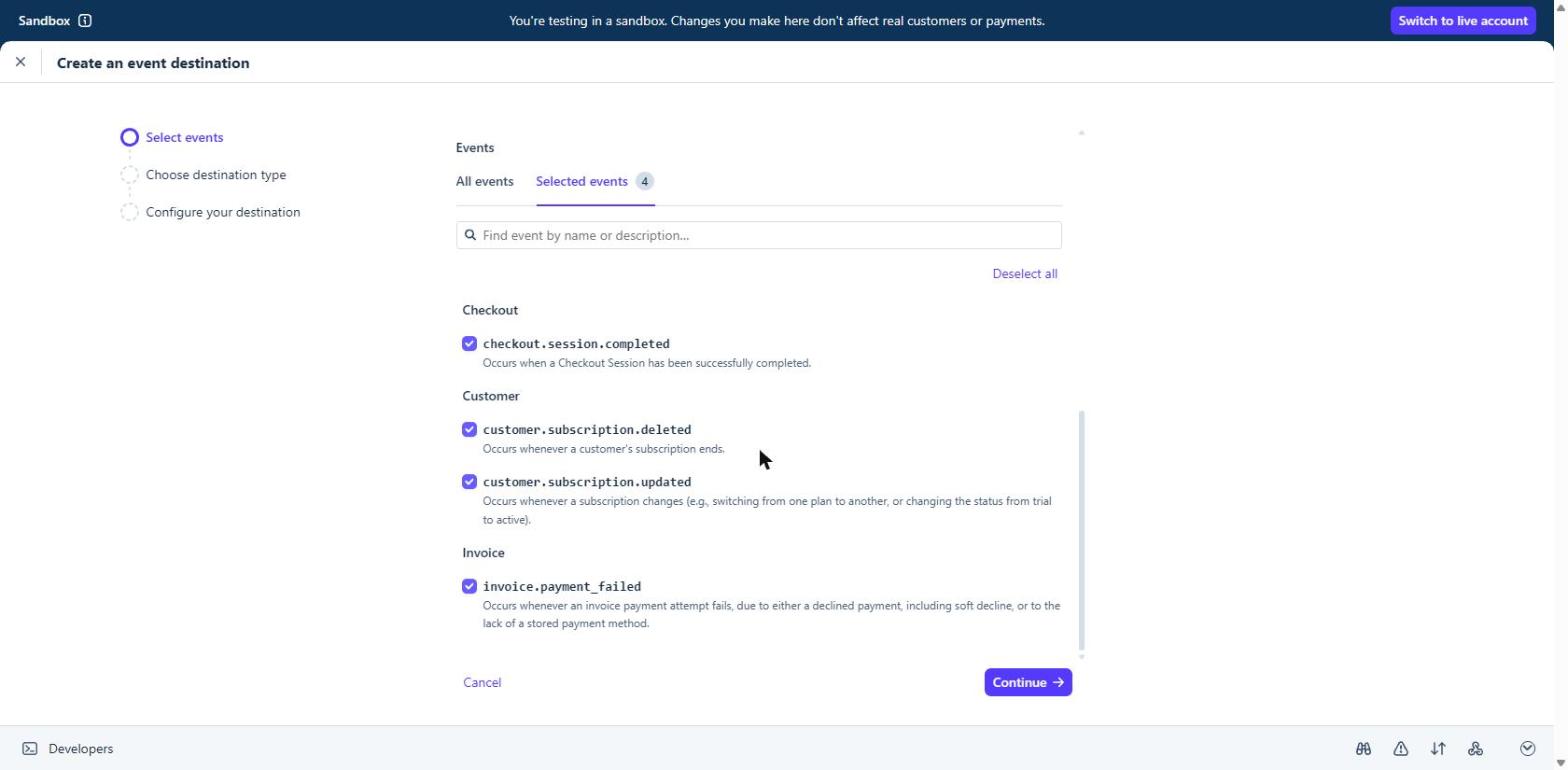
Choose Webhook endpoint as the destination type, then paste the address deploy printed into Endpoint URL and choose Create destination.
3. Copy the signing secret
Open the new destination. Under Signing secret, reveal the secret (the eye icon) and copy it.
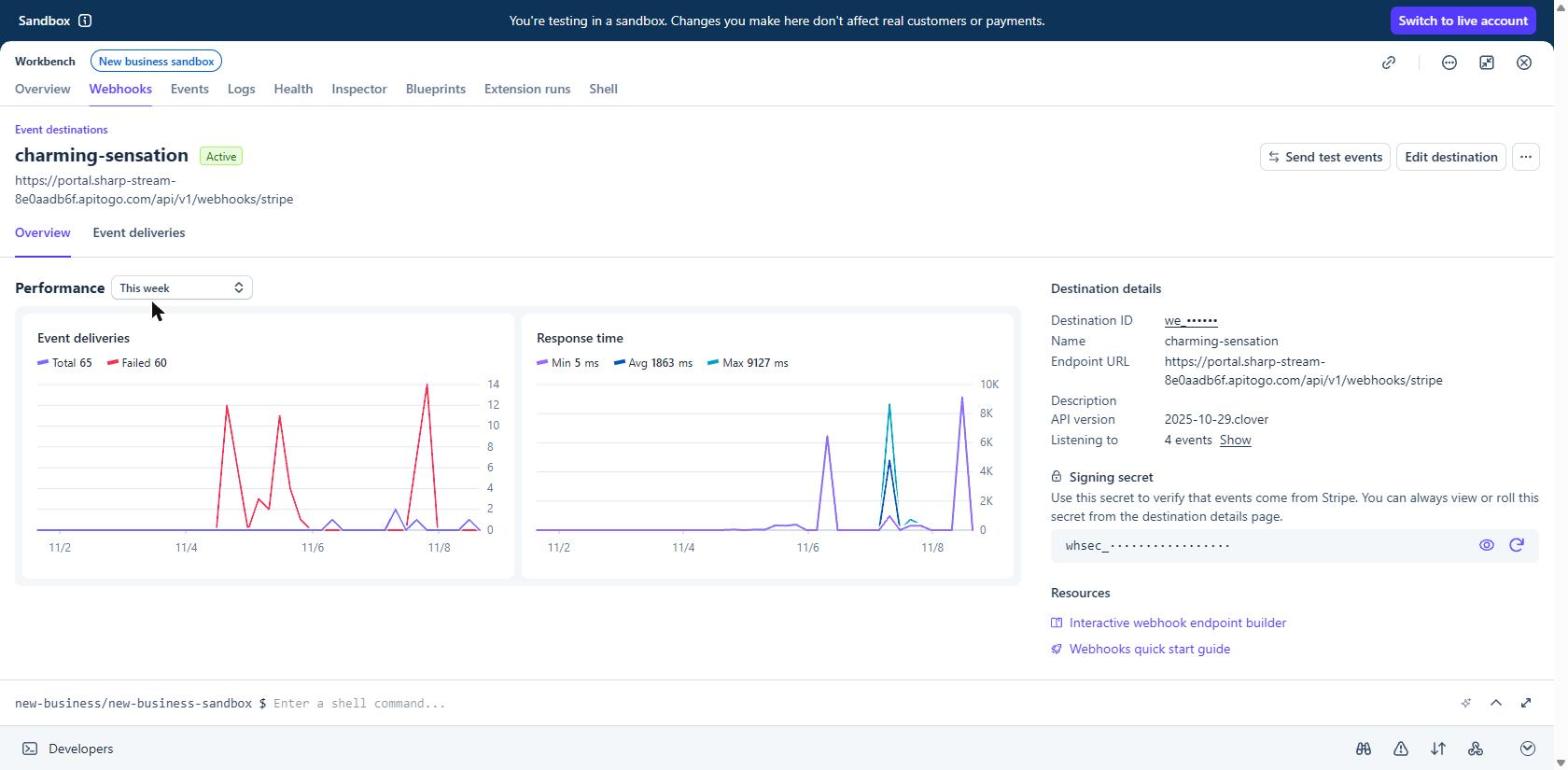
Paste it where deploy asks:
Code
If you skipped it, set it later and deploy the plans again:
Code
Check it works
Run apitogo deploy --only plans again. When Stripe has sent an event, it reports:
Code
Buy your own plan with a Stripe test card, such as
4242 4242 4242 4242, to send the first event.
Going live
Live mode has its own keys and its own webhooks. Switch to your live account in Stripe, repeat the three steps there, and set the new values:
Code
Selling paid plans needs the Starter or Professional hosting plan. See Gateway plans.